Getting Started with ROS2 Humble: Workspace, Packages, and Nodes
Introduction to ROS2 Workspace
A ROS2 workspace is your development environment where you organize, build, and test ROS2 packages. Think of it as your personal robotics lab—where all your code, configurations, and dependencies live.
Why is a ROS2 Workspace Important?
Organized Development: Keeps your ROS2 projects structured.
Dependency Management: Helps manage libraries and packages.
Build & Test Automation: Uses
colconto compile and run your code efficiently.Isolation: Prevents conflicts between different projects.
Objectives of This Guide
By the end of this blog, you will:
Set up a ROS2 Humble workspace.
Create a ROS2 package (Python & C++).
Write and run ROS2 nodes in Python and C++.
Prerequisites
Before starting, ensure you have:
Ubuntu 22.04 (recommended for ROS2 Humble)
ROS2 Humble installed (Official Installation Guide)
Basic terminal familiarity1: Setting Up a ROS2 Workspace
1.1 Create the Workspace Structure
A standard ROS2 workspace has:
src/– Contains source code (only folder you manually create).build/– Intermediate build files (auto-generated).install/– Compiled executables & libraries (auto-generated).log/– Build logs (auto-generated).
Commands to Set Up Workspace
mkdir -p ~/dojo_robotics_2025/src
cd ~/dojo_robotics_2025
1.2 Build the Workspace
colcon build
After running this, you’ll see
build/,install/, andlog/folders.1.3 Source the Workspace
To make ROS2 recognize your workspace:
Temporary (for current terminal session)
source install/setup.bashPermanent (add to
.bashrc)echo "source ~/dojo_robotics_2025/install/setup.bash" >> ~/.bashrc source ~/.bashrc
1.4 Verify Setup
Check if ROS2 recognizes your workspace:
ros2 pkg list
If successful, you’ll see a list of ROS2 packages.
1.5 Terminal Output After Workspace Setup

Terminal output showing successful ROS2 workspace creation, build process, and package list verification.
Note the generated build/, install/, and log/ directories after running colcon build.
2: Creating a ROS2 Package
2.1 Python Package
cd ~/dojo_robotics_2025/src
ros2 pkg create my_robot_package --build-type ament_python --dependencies rclpy std_msgs
This creates:
my_robot_package/
├── package.xml
├── setup.cfg
├── setup.py
├── resource/
│   └── my_robot_package
└── my_robot_package/
    └── __init__.py
2.2 C++ Package
ros2 pkg create my_robot_pack2 --build-type ament_cmake --dependencies rclcpp This creates:
my_robot_pack2/
├── CMakeLists.txt
├── include/
├── package.xml
└── src/
2.3 Customizing package.xml
Open package.xml and update:
<description>Beginner ROS2 package for learning</description>
<maintainer email="your@email.com">Your Name</maintainer>
<license>Apache License 2.0</license>
3 : Writing & Running Nodes
3.1 Python Node
Create my_first_node.py
cd ~/dojo_robotics_2025/src/my_robot_package/my_robot_package
touch my_first_node.py
chmod +x my_first_node.py
Code (my_first_node.py)
#!/usr/bin/env python3
import rclpy
from rclpy.node import Node

class MyFirstNode(Node):
    def __init__(self):
        super().__init__('first_node')
        self.create_timer(1.0, self.timer_callback)

    def timer_callback(self):
        self.get_logger().info('Timer callback executed!')

def main(args=None):
    rclpy.init(args=args)
    node = MyFirstNode()
    rclpy.spin(node)
    rclpy.shutdown()

if __name__ == '__main__':
    main()
Run the Node
To run the python node ensure to:
i) Add entry point in setup.py
Open setup.py with your preferred text editor and edit the console_scripts
entry_points={
        'console_scripts': [ 'my_first_node = my_robot_package.my_first_node:main'
        ],
    },
ii) Update setup.cfg, ensure it has this
[develop]
script_dir=$base/lib/my_robot_package[install]install_scripts=$base/lib/my_robot_package
iii)Rebuild with colcon build
Now run using this:
ros2 run my_robot_package my_first_node Expected Output:
[INFO] [first_node]: Timer callback executed!
Python Node Execution Output
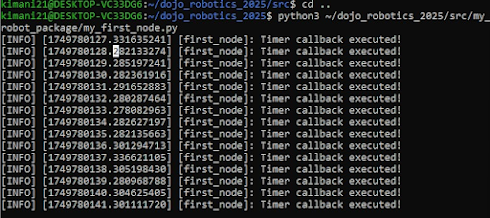
Output of the Python node showing successful execution. The node prints "Timer callback executed!" every second, demonstrating ROS2's timer functionality.
3.2 C++ Node
Create my_first_node.cpp
cd ~/dojo_robotics_2025/src/my_robot_pack2/src
touch my_first_node.cpp
Code (my_first_node.cpp)
#include "rclcpp/rclcpp.hpp"
using namespace std;

class MyFirstNode : public rclcpp::Node {
public:
    MyFirstNode() : Node("first_node") {
        timer_ = this->create_wall_timer(
            chrono::seconds(1),
            bind(&MyFirstNode::timer_callback, this));
    }

private:
    void timer_callback() {
        RCLCPP_INFO(this->get_logger(), "Timer callback executed!");
    }
    rclcpp::TimerBase::SharedPtr timer_;
};

int main(int argc, char * argv[]) {
    rclcpp::init(argc, argv);
    rclcpp::spin(make_shared<MyFirstNode>());
    rclcpp::shutdown();
    return 0;
}
Update CMakeLists.txt
Add:
add_executable(my_first_node src/my_first_node.cpp)
ament_target_dependencies(my_first_node rclcpp)
install(TARGETS my_first_node DESTINATION lib/${PROJECT_NAME})
Build & Run
cd ~/dojo_robotics_2025
colcon build
source install/setup.bash
ros2 run my_robot_pack2 my_first_node
Expected Output:
[INFO] [first_node]: Timer callback executed!
C++ Node Execution and Build Process

C++ node execution showing
Troubleshooting Tips
| Issue | Fix |
|---|---|
ros2: command not found | Run source /opt/ros/humble/setup.bash |
colcon: command not found | Install it: sudo apt install python3-colcon-common-extensions |
Package not found | Rebuild & source: colcon build && source install/setup.bash |
ImportError in Python | Check setup.py and __init__.py |
| C++ node not running | Verify CMakeLists.txt and rebuild |
Summary
Workspace Setup: Created dojo_robotics_2025 and built it with colcon.
Package Creation: Made Python (ament_python) and C++ (ament_cmake) packages.
Node Development: Wrote and ran a basic ROS2 node in both languages.
What’s Next?
Learn about ROS2 Topics & Publishers/Subscribers
Explore ROS2 Services & Actions
Integrate with real/simulated robots
Final Notes
You’ve just taken your first big step into ROS2! Now you can organize projects, create nodes, and debug issues. Keep experimenting, and soon you’ll be controlling robots like a pro!
🔗 References:
Happy coding!


Comments
Post a Comment